Melitta Caffeo Solo Kaffeevollautomat Test

Note: 2,6 (mäßig)
| Espresso: | 1,5 |
| Kaffee: | 1,7 |
| Cappuccino: | 2,7 |
| Latte Macchiato: | 3,2 |
| Handhabung: | 3,0 |
| Einstellungen: | 3,1 |
| Qualität: | 2,2 |
| Reinigung: | 2,7 |
Datenblatt
| Marke: | Melitta Kaffeevollautomat |
| Modell: | Caffeo Solo & Perfect Milk E957-103 |
| Milchsystem: | halbautomatisch |
| Getränke: | Espresso, Kaffee, Milchschaum |
| Brühgruppe: | entnehmbar |
| Mahlwerk: | Kegelmahlwerk |
| Mahlgrad: | 5 Stufen |
| Kaffeestärke: | 3 Stufen |
| Bohnenfach: | 125 g |
| Wassertank: | 1,2 l |
| Kaffeeauslass Höhe: | 8,5-13,2 cm |
Fazit zur Melitta Caffeo Solo
Nur für Espresso- und Kaffeetrinker optimal
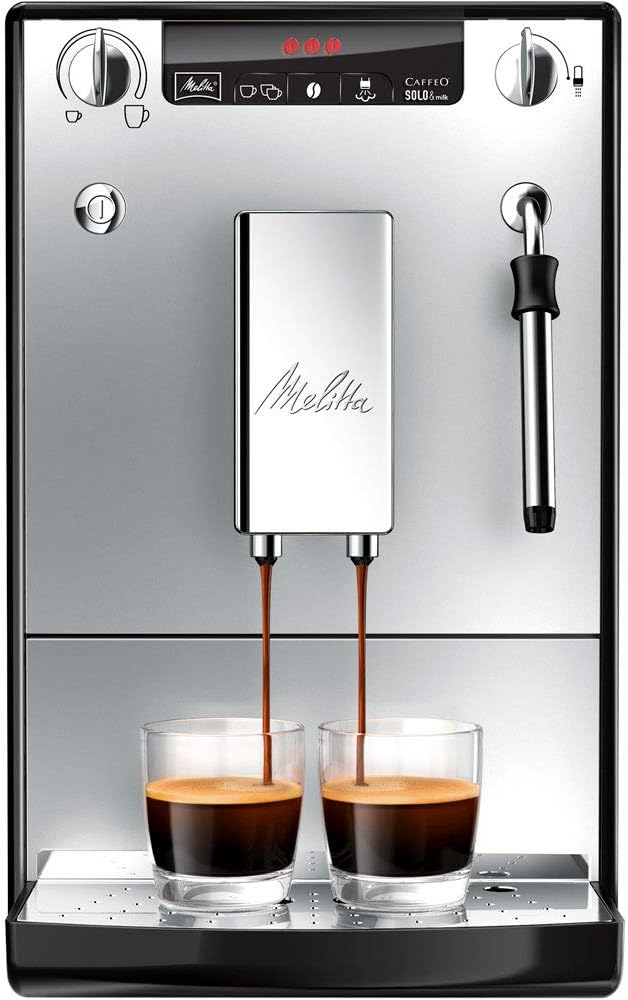
Mit der Melitta Caffeo Solo könnt ihr Espresso und Kaffee auf Knopfdruck zubereiten. Besonders überzeugt hat uns der intensive Espresso. Außerdem werden kleine Tassen Kaffee sehr aromatisch.
Wir haben uns übrigens für den Caffeo Solo & Perfect Milk entschieden, also das Modell mit Cappuccinatore. Perfekt wurde der Milchschaum allerdings nicht, sondern luftig und grob. Außerdem ist die Reinigung des Milchsystems umständlich. Von diesem Modell können wir daher nur abraten.
Das gilt aber nicht für den einfachen Melitta Caffeo Solo der sich auf Espresso und Kaffee spezialisiert. Dieses Modell ist einfach zu reinigen und bereitet mit wenigen Klicks gute Getränke zu.
Mit einer Breite von nur 20 cm ist es der schmalste Kaffeevollautomat im Test. Allerdings sind daher Wassertank, Bohnenfach und Auffangschalen etwas kleiner als bei vergleichbaren Modellen.
Wir empfehlen den Caffeo Solo daher für Puristen, die Espresso und Kaffee bevorzugen, und speziell für kleine Küchen. Wer Milchschaum zubereiten möchte, sollte sich lieber den Philips EP2200/10 oder die DeLonghi Magnifica S anschauen.
Vorteile:
- ideal für kleine Küchen – nur 20 cm breit
- aromatischer Espresso & guter Kaffee
- Getränkemenge stufenlos einstellbar
- heiße Milch für Kakao & Milchkaffee
- Milchschaum-Menge frei einstellbar
- relativ leises Mahlwerk & Milchsystem
- Doppelbezug möglich
Nachteile:
- Milchschaum sehr grob & luftig
- Milchsystem schwierig zu reinigen
Zusammenfassung des Tests
Wie gut sind die Getränke beim Melitta Caffeo Solo?
Besonders überzeugen konnte der Melitta Caffeo Solo beim Espresso und einer kleinen Tasse Kaffee. Abzüge gibt es beim Milchschaum.
Der Espresso ist aromatisch und hat eine feine, hellbraune Crema. Im Geschmack ist er sehr intensiv und kräftig. Die besten Ergebnisse haben wir auf Kaffeestärke Stufe 3 und Mahlgrad Stufe 2 erzielt.
Der Kaffee ist insgesamt gut und weniger bitter als wir es von anderen Vollautomaten kennen. Allerdings nur, wenn ihr maximal 100 ml bezieht. Für eine große Tasse könnt ihr einfach den Doppelbezug aktivieren. Durch die Extraktion von zwei Kaffeepucks wird er besonders aromatisch und weniger bitter. Kaffee und Espresso waren außerdem mit 72-75 °C richtig schön heiß.
Nicht überzeugen konnte der Caffeo Solo beim Milchschaum. Der ist relativ grob und luftig. Gerade beim Latte Macchiato war der Schaum besonders steif. Da sind andere Kaffeevollautomaten im Test deutlich besser.

Wir empfehlen den Caffeo Solo daher nur für reine Espresso- und Kaffeetrinker.
Wie leicht ist die Handhabung?
Beim Melitta Caffeo Solo bereitet ihr den Milchschaum mit dem integrierten Cappuccinatore zu. Dazu taucht ihr den Schlauch direkt in euren Milchkarton und öffnet ein Ventil am Vollautomaten. Nun saugt der Cappuccinatore die Milch an, schäumt sie auf und leitet den Milchschaum direkt in euere Tasse. Sobald ihr mit der Menge zufrieden seid, schließt ihr das Ventil wieder.
Anschließend bezieht ihr noch einen Espresso über den Kaffeeauslass und fertig ist euer Cappuccino. Die Zubereitung ist etwas aufwendiger als bei Geräten mit vollautomatischem Milchsystem, dafür ist die Melitta Caffeo Solo günstiger.

Mit einer Breite von nur 20 cm ist der Vollautomat einer der kleinsten im Test. Daher fallen auch Wassertank (1,2 Liter), Bohnenfach (125 g) und Auffangschalen um einiges kleiner aus, als bei anderen Kaffeevollautomaten im Test. Das Gerät eignet sich daher eher für 1 bis 2 Personen Haushalte.
Der kleine Wassertank hinten links ist von vorne nicht so gut zu erreichen. Die Öffnung des Bohnenfachs ist auch relativ schmal. Den Kaffeeauslass könnt ihr von 8,5 bis 13 cm Höhe anpassen. Ein großes Latte Macchiato Glas passt nur ganz knapp darunter.
Nach dem Einschalten ist der Vollautomat in einer Minute betriebsbereit. Beim Bezug der Getränke ist das Gerät durchschnittlich schnell.
Das Display ist dank der wenigen Knöpfe zwar minimalistisch aber verständlich. Für große Personen ist es von oben nicht so gut lesbar – hier wäre ein leicht schräges Display besser.
Beim Caffeo Solo geht die schmale Größe eindeutig zu Lasten der Handhabung. Hier sind die direkten Konkurrenten wie DeLonghi Magnifica S und Philips EP 2220/10 deutlich besser.
Was kann ich einstellen?
Über das Display stellt ihr die Kaffeestärke in 3 Stufen ein. Das ist relativ wenig, denn bei anderen Geräten sind es oft mehr. Den Mahlgrad könnt ihr in 5 Stufen einstellen. Die feinste Stufe ist optimal für Espresso. Ein Fach für gemahlenes Kaffeepulver habt ihr allerdings nicht.
Die Kaffeemenge regelt ihr über den Drehregler von 30 bis 220 ml. Hier noch ein Hinweis: Ihr habt keine Tasten für Espresso und Kaffee, sondern stellt alles über Drehregler ein. Für Espresso bezieht ihr z.B. 40 ml und für Kaffee 120 ml. Eine Beschriftung der genauen Milliliter vermissen wir jedoch. Hier ist Augenmaß gefragt.
Die Milchschaum Menge bestimmt ihr mit dem Cappuccinatore selbst. Ihr erhaltet solange Milchschaum bis ihr das Ventil wieder schließt (Augenmaß). Bei Vollautomaten mit Milchschaumdüse könnt ihr die Milch zumindest vorher abmessen. Das ist bei einem Cappuccinatore nicht so einfach möglich.

Immerhin seid ihr auch beim Kaffee-Milch-Verhältnis komplett flexibel. Theoretisch lassen sich mit dem Caffeo Solo sämtliche Rezepte zubereiten. Allerdings bestimmt ihr das Verhältnis von Espresso und Milchschaum immer nur per Augenmaß. Dadurch ist es schwerer konkrete Rezepte einzuhalten und gleichbleibende Ergebnisse zu erzielen. Immerhin bietet euch die Companion App von Melitta viele nützliche Tipps. Wer möchte kann auch einfach nur heiße Milch für z.B. Milchkaffee beziehen.
Die Brühtemperatur könnt ihr in 3 Stufen anpassen. Auf höchster Stufe werden Espresso und Kaffee ordentlich heiß (75°C). Beim Milchschaum könnt ihr die Konsistenz und die Temperatur nicht beeinflussen.
Espresso und Kaffee könnt ihr auch im Doppelbezug beziehen. Mit diesem günstigen Gerät lassen sich keine Favoriten oder Profile anlegen.
Alles in allem habt ihr bei den Einstellungen zwar viel Flexibilität (außer bei der Kaffeestärke), jedoch ist es schwer gleichbleibende Ergebnisse zu erzielen. Da ihr Kaffee- und Milchschaum Menge nach Augenmaß bezieht und diese sich nicht speichern lassen. Hier schneiden sogar Kaffeevollautomaten unter 300 € im Test deutlich besser ab.
Wie gut ist die Qualität?
Beim Caffeo Solo machen besonders die matte Frontblende und der Kaffeeauslass einen hochwertigen Eindruck. Das Tropfgitter ist aus glänzendem Edelstahl, ansonsten wurde überwiegend Kunststoff verbaut. Insgesamt sind die Einzelteile gut verarbeitet, nur die Serviceklappe an der Seite wirkt ein wenig klapprig.
An der Brühgruppe sind wichtige Teile aus Edelstahl, ansonsten ist sie (wie üblich) überwiegend aus Kunststoff. Das Display ist relativ klein, hat aber einen guten Kontrast. Alle Tasten haben alle einen guten Druckpunkt.

Beim Mahlwerk aus gehärtetem Stahl haben wir ca. 67 Dezibel gemessen. Das ist relativ leise. Die meisten Modelle in diesem Preisbereich sind rund 70 dB laut. Auch das Milchsystem ist mit 63,4 dB relativ leise.
Insgesamt ist die Qualität besser als wir es für diesen günstigen Preis erwartet hätten.
Wie einfach ist die Reinigung?
Den Cappuccinatore sollt ihr nach jedem Bezug mit sauberem Wasser durchspülen. Dafür braucht ihr zwei Tassen, was relativ umständlich ist. Ihr könnt den Cappuccinatore alternativ komplett zerlegen und unter fließendem Wasser abspülen. Im direkten Vergleich lässt sich eine Milchdüse allerdings deutlich leichter reinigen.

Die Auffangschalen für sind relativ klein und daher häufiger zu leeren. Das geht aber zügig. Sie gehen sehr leicht ausspülen und haben keine versteckten Ecken. In die Spülmaschine dürfen die Behälter leider nicht.
Die Brühgruppe könnt ihr entnehmen und solltet sie einmal pro Woche mit klarem Wasser abspülen. Wir haben während unseres Kaffeevollautomaten Test relativ wenige Kaffeereste gefunden. Im Innenraum aber ein wenig mehr.
Entkalken müsst ihr, je nach Kalkgehalt eures Wasser, ungefähr alle 1-2 Monate.
Insgesamt ist die Reinigung des Melitta Caffeo Solo etwas aufwendiger als bei anderen Modellen und dauert knapp 30 Minuten pro Woche. Grund: kompliziertes Milchsystem und Kaffeereste im Innenraum.
Noch Fragen?
Dann schaut euch unseren ausführlichen Testbericht an. Nutzt das Inhaltsverzeichnis falls euch etwas Bestimmtes interessiert. Solltet ihr noch eine Frage haben, könnt ihr uns gerne einen Kommentar hinterlassen.
Den Melitta Caffeo Solo gibt es insgesamt in drei unterschiedlichen Ausführungen. Wir stellen euch hier das Modell „Caffeo Solo & Perfect Milk“ mit Cappuccinatore vor. Damit könnt ihr Milchschaum auf Knopfdruck zubereiten. Das Modell „Caffeo Solo & Milk“ hat eine einfache Düse mit der ihr selbst Milch aufschäumen könnt. Und das Modell „Caffeo Solo“ ist rein auf Espresso und Kaffee ausgelegt. Milchschaum könnt ihr damit nicht zubereiten.

Caffeo Solo & Perfect Milk: Über den automatischen Cappuccinatore gibt es Milchschaum auf Knopfdruck. Ideal für alle die neben Espresso und Kaffee auch Cappuccino oder Milchkaffee zubereiten möchten.
Caffeo Solo & Milk: Mit der integrierten Milchschaumdüse könnt ihr selbst Milchschaum zubereiten. Das ist etwas aufwändiger aber perfekt, wenn ihr Konsistenz und Temperatur des Schaums selbst beeinflussen wollt.

Caffeo Solo: Für alle die auf Knopfdruck einfach guten Espresso und Kaffee genießen wollen. Purer Kaffeegeschmack, einfache Bedienung und weniger Reinigungsaufwand. Perfektes Modell für kleine Küchen.
Preise vom 18. Oktober 2025 7:12 (CET) Produktpreise und Verfügbarkeit entsprechen dem angegebenen Stand (Datum/Uhrzeit) und können sich ändern. Für den Kauf dieses Produkts gelten die Angaben zu Preis und Verfügbarkeit, die zum Kaufzeitpunkt auf Amazon.de angezeigt werden.
Der Melitta Caffeo Solo ist nur 20 cm breit und damit nochmal 5 cm schmaler als andere kleine Vollautomaten – wie z.B. der Latte Go von Philips. Damit ist er perfekt für eine kleine Küche geeignet. Die Frontblende wirkt optisch edel, obwohl sie nur aus einem matten Kunststoff gefertigt ist.

der Vollautomat ist nur 20 cm breit

Blende aus silber-matten Kunststoff
Milchsystem der Melitta Caffeo Solo
Milchschaum bereitet der Kaffeevollautomat mit der integrierten Cappuccinatore zu (halbautomatisches Milchsystem). Dazu hängt ihr den Schlauch direkt in einen Milchkarton. Jetzt aktiviert ihr den Wasserdampf am Vollautomaten und stellt eure Tasse unter. Das Gerät heizt kurz vor. Danach öffnet ihr das Ventil oben rechts und schon läuft Milchschaum in eure Tasse. Die Menge an Milch bzw. Milchschaum bestimmt ihr dadurch per Augenmaß selbst. Je nachdem wie lange ihr das Ventil öffnet. Für einen Cappuccino stellt ihr anschließend euer Glas unter den Kaffeeauslauf und bezieht einen Espresso.
Mit durchschnittlich 63,4 dB ist das Milchsystem ziemlich leise – nur am Anfang zischt es einmal etwas lauter. Nach dem Bezug stellt ihr den Milchkarton einfach wieder in den Kühlschrank. Den Cappuccinatore (so nennt man das Milchsystem) könnt ihr komplett zerlegen und abspülen. Es gibt aber auch ein Spülprogramm, dazu aber unter dem Punkt „Reinigung“ mehr.
Ihr könnt immer nur eine Tasse mit Milchschaum füllen, nicht zwei gleichzeitig. Das geht nur mit vollautomatischen Systemen. Dafür könnt ihr aber neben Milchschaum auch noch warme Milch beziehen, z.B. für Kakao. Sehr praktisch wenn ihr Kinder habt. Die Qualität des Cappuccinatore hat uns auf jeden Fall überzeugt – er wirkt gut durchdacht.

der Melitta Caffeo Solo & Perfect Milk hat einen Cappuccinatore

für Milchschaum erst Wasserdampf aktivieren

danach dieses Ventil öffnen

sie lässt sich ganz leicht abnehmen

… auseinander bauen und reinigen

den Milchschlauch steckt ihr direkt in die Milchpackung
Bohnenfach
Das Bohnenfach ist oben rechts auf dem Vollautomaten und es passen 125 g Bohnen hinein. Damit könnt ihr ca. 10-14 Getränke zubereiten. Je nach dem wie stark ihr euren Espresso oder Kaffee trinkt. Der Melitta Caffeo Solo ist einer der wenigen Vollautomaten die euch auf ein leeres Bohnenfach hinweisen. Dann blinken die Bohnen im Display. Einfach nachfüllen und ein Getränk beziehen, dann stoppt das Blinken. Die Öffnung des Fachs ist recht groß und gut zu erreichen.
Leider ist der Deckel nicht abgedunkelt und auch nicht komplett luftdicht. Beides wäre aber besser für’s Aroma der Bohnen. Da das Bohnenfach aber so klein ist spielt das kaum eine Rolle. Die Bohnen rutschen gut in Richtung des Mahlwerks und werden immer komplett aufgebraucht. Ein extra Fach für gemahlenes Kaffeepulver gibt es nicht.

Bohnenfach mit durchsichtigem Deckel

kleines Bohnenfach fasst 125 g
Mahlwerk der Melitta Caffeo Solo
Im Melitta Caffeo Solo & Perfect Milk ist ein Kegelmahlwerk aus gehärtetem Stahl verbaut. Es ist in 5 Stufen verstellbar. Den Schalter dafür findet ihr hinter der Abdeckung (Serviceklappe) auf der rechten Seite des Vollautomaten. Ganz links ist die feinste Stufe, auf der rechten Seite wird es gröber. Das Mahlwerk soll nur während dem Mahlvorgang verstellt werden. Am besten auch nur um eine Stufe.
Das Verstellen ist sehr einfach und es ist auch klar spürbar wann die nächste Stufe eingestellt wurde. Das ist nicht bei jedem Vollautomaten immer so einfach wie hier. Mit durchschnittlich ca. 67 dB ist das Mahlwerk relativ leise. Zwar nicht so leise wie z.B. beim Siemens EQ.500, aber doch leiser als viele andere Vollautomaten.
Der Mahlgrad ist auf feinster Stufe gut, aber nicht sehr gut. Das Ziel ist gleichmäßig feines Kaffeepulver. Um das zu überprüfen haben wir einen Kaffeepuck getrocknet und dann genau unter die Lupe genommen. Bei unserem Siebtest sind uns zwischen dem teilweise sehr feinen Kaffeepulver aber auch einige gröber Partikel aufgefallen. Da haben wir bei anderen Mahlwerken schon bessere Ergebnisse gesehen. Aber trotzdem schneidet das Mahlwerk insgesamt „gut“ ab.

den Regler für das Mahlwerk findet ihr hinter der Serviceklappe

das Mahlwerk hat 5 Stufen
Wassertank
Den Wassertank findet ihr links hinten auf dem Vollautomaten. Er lässt sich über den integrierten Griff leicht anheben und einfach entnehmen. Ihr braucht links neben dem Melitta Caffeo Solo aber ein bisschen Platz um den Tank nach vorne zu euch zu holen. Noch praktischer wäre es, wenn der Tank direkt vorne angebracht wäre. Aber das ist bei einem so kompakten Vollautomaten wohl nicht machbar.
Es passen 1,2 Liter Wasser hinein – der Tank ist also recht klein. Ihr müsst ihn fast jeden Tag auffüllen. Aber das ist auch gut so, denn frisches Wasser ist wichtig für guten Kaffee. Im Display leuchtet eine LED falls ihr Wasser nachfüllen müsst. Die Öffnung ist ausreichend groß und ihr könnt den Tank auch gut per Hand auswischen.
Unten im Tank findet ihr einen Anschluss für Wasserfilter. Den solltet ihr verwenden wenn das Wasser bei euch sehr kalkhaltig ist. Oder ihr filtert es vorab per Tischwasserfilter. Stellt auf jeden Fall am Gerät den Härtegrad des Wasser ein – dann erinnert er euch ans Entkalken. Dazu später mehr. Die Qualität ist insgesamt gut.

Wassertank ist hinten am Gerät

er fasst bis zu 1,2 Liter Wasser

Anschluss für den Wasserfilter

Wassertank leer – Hinweis im Display

oder ihr entnehmt ihn mit Hilfe des Griffs

er lässt sich entweder direkt am Gerät befüllen
Kaffeeauslass
Den Kaffeeauslass könnt ihr von 8,5 bis 13,2 cm in der Höhe verstellen. Das ist wichtig, damit an der kleinen Espresso Tasse nichts vorbei spritzt und auch ein großes Latte Macchiato Glas noch drunter passt. Der Abstand zur Espresso Tasse ist hier noch recht groß, im Test ging aber trotzdem nichts daneben. Ein großes Latte Macchiato passt auch drunter. Wir mussten es leicht kippen, aber es funktioniert.
Der Melitta Caffeo Solo hat zwei Kaffeeauslässe. Ihr könnt also auch zwei Espresso oder Kaffee gleichzeitig beziehen. Dafür müsst ihr einfach 2x auf den Bezugs-Knopf drücken. Die Blende des Kaffeeauslass ist silber-glänzend und optisch schick. Leider sind Fingerabdrücke oder Wasserspritzer recht schnell zu sehen.

2 Ausläufe für den Doppelbezug von Kaffee oder Espresso

relativ großer Abstand beim Espresso Glas

das Latte Macchiato Glas passt gut darunter

dieses große Glas passt sogar gleichzeitig unter Kaffeeauslauf und Cappuccinatore
Abtropfschale & Kaffeesatzbehälter
Die Auffangschalen für Wasser und Kaffeepucks könnt ihr einfach nach vorne herausziehen. Es passen ca. 8 Kaffeepucks in den Behälter. Bei regelmäßiger Nutzung mit zwei Personen müsst ihr die Auffangschalen also 1x am Tag ausleeren. Das ist aber wirklich einfach. Die Tropfschale wird nie ganz voll, da ihr schon vorher per LED im Display ans Ausleeren erinnert werdet. So schwappt auch nichts über wie bei manch anderem Vollautomaten.
Beide Behälter am besten immer gleichzeitig leeren, denn sonst kommt der Melitta Caffeo Solo beim Zählen der Kaffeepucks durcheinander. Die Behälter dürfen nicht in die Spülmaschine, zumindest gibt es keinen Hinweis in der Anleitung. Einige haben es trotzdem gemacht. Im Eco-Modus bis 50°C ist es wohl kein Problem.
Das Abtropfgitter ist aus Edelstahl und macht einen hochwertigen Eindruck auf uns. Der Rest, also die Blende und die beiden Auffangschalen, sind aus Kunststoff. Die Qualität ist gut, aber nicht überragend.

das Abtropfgitter ist aus hochwertigem Edelstahl

die Auffangschalen könnt ihr einfach nach vorne herausziehen

Kaffeesatzbehälter und Abtropfwanne

dieser Schwimmer steht oben sobald die Abtropfschale voll ist
Brühgruppe der Melitta Caffeo Solo
Auf der rechten Seite ist eine Serviceklappe hinter der ihr die Brüheinheit der Melitta Caffeo Solo & Perfect Milk findet. Einfach den kleinen roten Knopf drücken und den Hebel nach links drehen. Schon könnt ihr die Brühgruppe herausziehen. Sie ist überwiegend aus Kunststoff gefertigt. Einige stark beanspruchte Teile sind auch aus Edelstahl, z.B. die Klammern die andere Teile bewegen.
Qualitativ macht die Brüheinheit der Melitta Caffeo Solo einen guten Eindruck. Die Kaffeepucks werden auf jeden Fall gut gepresst und extrahiert. Denn im Auffangbehälter haben wir perfekt geformte Pucks vorgefunden. Allerdings gibt es schon einige versteckte Ecken. Mal sehen wie viel Kaffeepulver wir dort nach ein paar Bezügen finden.

zum Entnehmen der Brühgruppe diesen roten Knopf drücken und nach links drehen…

anschließend kann die Brühgruppe an diesem Griff entnommen werden

die Brühgruppe besteht überwiegend aus Kunstoff – macht aber einen soliden Eindruck

Stempel aus Edelstahl
Display
Das Display ist sehr einfach gehalten und nutzt nur Symbole, keine Schrift. Mehr ist hier aber auch nicht nötig. Die Getränkemenge kann über einen Drehregler in 5 ml-Schritten eingestellt werden. Ihr könnt zwischen 25 und 220 ml einstellen.
Über das Tassensymbol startet ihr den Bezug eures Getränks. Wenn ihr den Knopf zweimal drückt, aktiviert ihr den Doppelbezug. Dann könnt ihr zwei Tassen Espresso oder Kaffee gleichzeitig beziehen. Oder einen doppelten Espresso in einer Tasse, um z.B. einen großen oder extra starken Cappuccino zuzubereiten. Über drei Stufen (Bohnen) könnt ihr das Aroma eures Kaffees einstellen.
Der dritte Knopf dient dazu den Wasserdampf zu aktivieren. Den benötigen wir um unsere Milch aufzuschäumen. Wie das genau funktioniert zeigen wir euch bei den Getränken.
Von vorne ist das Display gut lesbar. Damit es noch besser von oben zu lesen ist, wäre ein leicht schräges Display noch besser. Große Personen müssen sich hier etwas bücken. Die Knöpfe haben alle einen klaren Druckpunkt und auch beim Drehregler ist die jeweils nächste Stufe gut zu spüren.
Eine Beschriftung der Knöpfe gibt es nicht, alles wird über Symbole dargestellt. Aber diese sind wirklich eindeutig. Zum Beispiel ein Wasserhahn + Tropfen wenn der Wassertank leer ist. Ihr versteht den Melitta Caffeo Solo bestimmt auch ohne Anleitung. Falls eine Frage aufkommt findet ihr in der Anleitung kurze und klare Anweisungen. Oder ihr greift zur Melitta „Companion“ App. Dort ist vieles einfach Schritt-für-Schritt erklärt, z.B. wie ihr einen Wasserfilter einsetzt.

über diesen Drehschalter regelt ihr die Getränkemenge

über diese 3 Knöpfe regelt ihr den Doppelbezug, die Kaffeestärke und die Cappuccinatore
Den Melitta Caffeo Solo startet ihr über den runden Knopf links neben dem Kaffeeauslass. Bei den Modellen ohne Milchschaumdüse ist der Knopf oben rechts. Es dauert knapp eine Minute bis der Vollautomat betriebsbereit ist. In dieser Minute heizt er vor und führt einen Spülvorgang durch. Dann könnt ihr direkt mehrere Getränke nacheinander beziehen.
Ab Werk schaltet sich der Vollautomat nach 30 Minuten komplett aus und nach 5 Minuten geht er in den Energiespar-Modus. Beides könnt ihr stufenweise an eure Bedürfnisse anpassen. Wie das funktioniert erklären wir euch unter „Einstellungsmöglichkeiten“.
Jetzt starten wir endlich mit den wichtigen Details zu den verschiedenen Getränken. Wir erklären euch genau wie ihr den Vollautomaten am besten einstellt um den optimalen Geschmack zu erreichen. Für unsere Tests verwenden wir immer die gleichen Kaffeebohnen (Mischung aus Arabica und Robusta) und die gleiche Bio H-Milch (3,8% Fett). So können wir die Vollautomaten direkt miteinander vergleichen. Der Robusta-Anteil sorgt für einen Koffein-Kick und eine schöne Crema.

über diesen Knopf schaltet ihr den Caffeo Solo & Perfect Milk ein

nach dem Einschalten führt das Gerät einen Spülvorgang durch
Kräftiger Espresso mit der Melitta Caffeo Solo
Zuerst beziehen wir einen kräftigen Espresso und vergleichen diesen anschließend mit einem Milden. Dazu stellen wir wieder eine Getränkemenge von 40 ml ein. Beim Aroma gehen wir auf die höchste Stufe (3 Bohnen) damit der Vollautomat viel Kaffeepulver verwendet. Den Mahlgrad stellen wir auf die feinste Stufe. Wir wollen schließlich einen möglichst kräftigen und intensiven Espresso.
Durch das feine Kaffeepulver erzeugen wir viel Gegendruck. In unserem Test hat die Pumpe trotzdem genügend Power für diese Kombination. Wir hatten schon Vollautomaten, deren Pumpen versagt haben. Da tropfte nur noch etwas Espresso in die Tasse. Doch der Melitta Caffeo Solo überzeugt uns.
Durch viel feines Kaffeepulver wird die Kontaktzeit verlängert. Wir erwarten daher eine dunkle Crema und einen intensiven Koffein-Kick mit vielen Aromen. Mal schauen ob der Melitta Caffeo Solo das liefern kann. Die Zubereitung dauert gut 40 Sekunden. Die Temperatur liegt bei 75°C. Wir erhalten einen Espresso mit dunkler Crema. Geschmacklich kommt er dem klassischen Espresso aus dem Siebträger sehr nahe. Ein echter Wachmacher.
Es ist zwar nicht der beste Espresso in unserem Test, aber trotzdem ein sehr guter. Die für unsere Bohnen typischen Aromen von Nuss und Schokolade kommen gut zur Geltung.

für Espresso benötigt der Automat nur 40 Sekunden

kräftiger Espresso mit dunkelbrauner Crema
Milder Espresso
Für die milde Variante stellen wir eine Getränkemenge von 40 ml ein. Das entspricht ungefähr die Mitte des ersten Bereichs beim Drehregler. Das Aroma bzw. Kaffeestärke stellen wir diesmal auf eine Bohne. Daher wird also relativ wenig Kaffeepulver verwendet. Den Mahlgrad stellen wir auf Stufe 2, also die zweit-feinste Stufe.
Durch das „gröbere“ Kaffeepulver wird das Wasser schneller hindurch durchgepresst. Dadurch wird der Espresso weniger intensiv. Durch die kürzere Kontaktzeit schmeckt der Espresso wesentlich milder. Von der Intensität ist das hier gar kein Vergleich zum kräftigen Espresso davor. Der Bezug inklusive Mahlvorgang dauert wieder gut 40 Sekunden. Wir messen eine optimale Temperatur von 73- 75°C. Der Espresso ist auf jedem Fall heiß genug. Die meisten Aromen schmeckt ihr übrigens bei 60-65°C. Also lasst den Espresso kurz abkühlen bevor ihr ihn trinkt. Das geht bei den kleinen Tassen recht schnell.
Die Crema ist fein und relativ hell – fast schon zu hell für Espresso. Dieser zeichnet sich eigentlich durch eine Haselnussbraune Crema aus. Geschmacklich ist der Espresso, wir zu erwarten, deutlich milder. Mit Espresso im klassischen Sinne hat das wenig zu tun. Wir wollten euch einfach mal den Unterschied zeigen.

gute Temperatur von 73 °C

Vergleich zwischen kräftigen und milden Espresso
Kaffee
Jetzt kommen wir zum klassischen Kaffee. Der wird im Vollautomaten anders zubereitet. Zum Vergleich: bei einer Filterkaffeemaschine sickert das Wasser langsam durch das Kaffeepulver und durch einen Papierfilter direkt in die Kanne. Beim Melitta Caffeo Solo wird der Kaffee (genau wie Espresso) in der Brühgruppe unter hohem Druck gebrüht. Wie ihr den Vollautomaten einstellen müsst, damit der Kaffee gelingt, verraten wir euch jetzt.
Wir beziehen zwei Tassen Kaffee mit je 180 ml und stellen dazu den Regler für die Wassermenge fast komplett nach rechts (Beginn des letzten Bereichs). Maximal möglich sind übrigens 220 ml je Tasse. Bei unseren Tests haben wir jedoch maximal 210 Milliliter erhalten. Die restlichen 10 ml befinden sich wahrscheinlich noch im Kaffeepuck – aber egal. Wir wollen ja nicht pingelig sein.
Die Kaffeestärke stellen wir auf 2 Bohnen (mittel) und den Mahlgrad auf mittelfein – Stufe 3. Würden wir hier einen sehr feinen Mahlgrad verwenden, könnte der Kaffee schnell bitter werden. Je feiner das Kaffeepulver, desto länger brüht der Vollautomat und desto mehr Bitterstoffe werden aus dem Kaffeepulver gelöst. Ihr könnt aber auch gerne Stufe 2 ausprobieren und experimentieren. Vom feinsten Mahlgrad in Kombination mit starkem Aroma raten wir euch jedoch ab. Hier wäre ein Americano die bessere Wahl. Den zeigen wir euch später…
Für den Doppelbezug platzieren wir jede Tasse unter einem Kaffeeauslauf und drücken 2x die Bezugs-Taste. Nach der Hälfte der Zubereitung presst der Automat einen neuen Kaffeepuck und startet einen zweiten Brühvorgang. Wenn für beide Tassen nur ein Puck verwendet würde, wäre der Kaffee viel zu dünn und bitter. Für eine Tasse hat der Automat 1:15 Minuten gebraucht. Für 2 Tassen benötigt er 2:25 Minuten – also doppelt solange.
Die Temperatur des Kaffees sollte mindestens 70 °C haben. In unserem Test messen wir 72°C – das ist schön heiß. Der Kaffee besitzt auch eine dünne hellbraune Crema. Der Geschmack ist intensiv und aromatisch und im Vergleich zu anderen Vollautomaten weniger bitter. Wir würden ihn im vorderen Mittelfeld unseres Kaffeevollautomaten Tests einordnen.

2 Tassen Kaffee im Doppelbezug

im Geschmack liegt der Kaffee in unserem Test vorne
Cappuccino mit der Melitta Caffeo Solo
Beim Cappuccino wird es jetzt für alle Milchschaum-Fans interessant, denn wie ihr wisst besitzt der Melitta Caffeo Solo & Perfect Milk einen eingebauten Cappuccinatore. In unserem Test haben wir den cremigsten Milchschaum übrigens mit Bio H-Milch (3,8% Fett) erhalten. Pflanzliche Barista-Editionen aus Soja- oder Hafermilch eignen sich natürlich auch. Wichtig ist, dass eure Milch „Kühlschrank kalt“ ist. Ansonsten erwärmt der Vollautomat sie zu stark.
Für einen Cappuccino beziehen echte Barista zuerst einen Espresso und geben anschließend den Milchschaum dazu. Viele Vollautomaten machen das aber gerne andersherum. Mit der Cappuccinatore haben wir die Reihenfolge jedoch selbst in der Hand. Deshalb testen wir direkt beide Varianten.
Ein Reinfall – Cappuccino in der klassischen Reihenfolge
Zuerst beziehen wir ganz normal einen Espresso. Die Getränkemenge stellen wir auf 40 ml und das Aroma auf Stufe 2. Den Mahlgrad stellen wir, wie für Espresso empfohlen, auf Stufe 2. Bei Wassermenge, Aroma und Mahlgrad könnt ihr experimentieren – je nachdem wie kräftig euer Cappuccino sein soll.
So lange der Espresso zubereitet wird, holen wir die Milch aus dem Kühlschrank und hängen den Schlauch der Cappuccinatore in den Milchkarton. Sobald unser Espresso fertig ist, aktivieren wir den Knopf für Wasserdampf (letzter der 3 Knöpfe). Jetzt heizt der Vollautomat vor – das dauert ca. 30 Sekunden. Die Tasse schieben wir nach rechts unter den Cappuccinatore. Über den Drehschalter (oben rechts) starten wir den Bezug des Milchschaums. Der Cappuccinatore zieht sich jetzt automatisch Milch aus dem Milchkarton, schäumt sie auf und leitet sie in unsere Tasse. Sobald wir mit der Milchschaum- Menge zufrieden sind, schließen wir das Ventil wieder indem wir den Drehschalter zurück drehen.
Wir versuchen ungefähr 100 ml Milch (-schaum) in die Tasse zu bekommen. Hierfür ist Augenmaß und Gefühl notwendig. Die exakte Menge lässt sich nur schwer bestimmen. Dadurch kann es leicht passieren, dass wir mal mehr und mal weniger Milchschaum in unserem Glas haben. Die Zubereitung ging mit 1:45 Minuten recht flott.
Doch im Temperatur-Check kommt der Cappuccino gerade einmal auf 60 °C – das ist zu wenig. Optimal wären 67°C. Eigentlich ist es auch kein Wunder, denn der Espresso kühlt bereits ab während das Milchsystem aufheizt. Hier verstreichen mindestens 30 Sekunden. Leider können wir das Milchsystem aber auch nicht aufheizen lassen während der Espresso brüht.
Auch das Aussehen überzeugt uns nur mäßig. Der Schaum ist teils braun, teils weiß mit größeren Blasen. Kein Wunder, denn die Milch ist aus der Cappuccinatore regelrecht rausgeschossen, auf den Espresso getroffen und hat diesen aufgewirbelt. Deshalb sieht der Schaum etwas chaotisch aus.

als erstes beziehen wir einen Espresso

danach beziehen wir Milchschaum indem wir das Ventil öffnen

sobald wir mit der Milchschaum-Menge zufrieden sind schließen wir das Ventil wieder

beziehen wir erst den Espresso ist der Cappuccino nur lauwarm
Besser: Cappuccino nach Anleitung
Als nächstes probieren wir die Reihenfolge aus, die die Anleitung vorgibt. Diesmal beziehen wir als erstes den Milchschaum und anschließend den Espresso. Der Vorteil hierbei ist, dass der heiße Espresso später ins Glas kommt und nicht schon vorher abkühlen kann. Dadurch ist auch die Temperatur insgesamt höher. Wir messen diesmal 68°C – das ist perfekt. Auch der Milchschaum sieht diesmal wesentlich „ordentlicher“ aus. Anscheinend haben wir das große Rätsel gelöst weshalb Vollautomaten die Reihenfolge beim Cappuccino ändern: so gelingt er ihnen einfach besser. Ein Vollautomat ist eben eine Maschine die nicht die Fingerfertigkeit eines Baristas besitzt.
Unser Fazit: der Melitta Caffeo Solo & Perfect Milk bereitet für seine Preiskategorie mittelmäßigen Milchschaum. Die Aromen des Espressos kommen gut zur Geltung, aber die leichte Süße der Milch fehlt uns hier. Der Milchschaum ist nicht ganz so fein und daher weniger cremig als bei anderen Modellen. Den Geschmack würden wir im Vergleich mit anderen Vollautomaten als „gut“ bezeichnen. In unserem Vollautomaten Test gibt es günstigere Modelle die besseren Cappuccino zubereiten.

Ergebnis erst Milchschaum dann Espresso

zum Vergleich: erst Espresso dann Milchschaum

perfekte Temperatur mit 68 °C

Milchschaum – vereinzelt mit größeren Blässchen
Latte Macchiato
Als Nächstes schauen wir uns den zweiten Milchschaum Klassiker – den Latte Macchiato an. Zuerst bereiten wir den Milchschaum zu. Dazu aktivieren wir den Knopf für Wasserdampf. Das Gerät heizt wieder ungefähr 30 Sekunden auf. Währenddessen hängen wir den Schlauch in die kalte Milch. Wir verwenden wieder die gleiche Milch – Bio H-Milch mit 3,8% Fett. Jetzt stellen unser großes Latte Macchiato Glas unter den Cappuccinatore und öffnen über den Drehschalter das Ventil für Milchschaum.
Wir beziehen so viel Milchschaum bis das Glas zu 3/4 voll ist – das entspricht ungefähr 150 ml Milch (aufgeschäumt ca. 300ml). Übrigens verdoppelt sich das Volumen der Milch beim Aufschäumen. Sobald wir mit der Menge zufrieden sind schließen wir das Ventil wieder. Jetzt drücken wir erneut den Knopf für Wasserdampf, um in den normalen „Kaffee-Modus“ zu wechseln. Das erkennt ihr daran, dass die Bohnen für die Kaffeestärke wieder blinken. Unser Latte Macchiato Glas ist sogar so groß, dass es gleichzeitig unter Cappuccinatore und Kaffeeauslauf passt. Dadurch müssen wir es jetzt nicht nochmal verschieben. Jetzt beziehen wir einen 40 ml Espresso mit mittlerer Stärke. Insgesamt dauert der Bezug rund 2 Minuten.
Was uns beim Milchschaum aufgefallen ist: Beim ersten Getränk fließt meistens erst etwas heißes Wasser aus der Cappuccinatore bevor der Milchschaum kommt. Das verdünnt die Milch und kann den Geschmack verwässern. Anscheinend hängt der Fehler mit der Technik der Cappuccinatore beim Aufheizen zusammen. Die Wassermenge ist jedoch so gering, dass wir keinen geschmacklichen Unterschied feststellen konnten.
Die Temperatur war mit über 70°C relativ hoch. Das kommt vielleicht daher, dass wir schon einige Getränke bezogen haben. Ideal sind ca. 65-67°C. Die drei Schichten des Latte Macchiato sind nicht so gut zu erkennen. Der Übergang zwischen warmer Milch und Espresso verschwimmt hier ziemlich. Milchschaum gibt’s eine ganze Menge. Die Konsistenz ist wieder ok, aber nicht überragend. Die Bläschen sind nicht so fein und gleichmäßig wie erhofft. Uns fehlt die leichte Süße der Milch. Durch den aromatischen Espresso schmeckt der Latte am Ende gut, aber eben nicht sehr gut.

das Latte Macchiato passt gut unter Cappuccinatore und Kaffeeauslass

der Milchschaum ist nicht cremig sondern eher steif
Milchkaffee
Viele von euch trinken besonders gerne Milchkaffee. Dieser besteht aus einer Hälfte Kaffee und einer Hälfte heiße Milch. Auch den könnt ihr mit dem Melitta Caffeo Solo & Perfect Milk zubereiten. Wir verraten euch jetzt wie es geht. Zuerst beziehen wir einen normalen Kaffee.
Dazu stellen wir den Mahlgrad 3 und die Getränkemenge auf 100 ml. Dafür müsst ihr den Drehregler ungefähr oben in die Mitte stellen. Beim Aroma wählen wir eine mittlere Stärke, also 2 Bohnen. Dann starten wir den Bezug. Anschließend aktivieren wir den Wasserdampf damit der Vollautomat vorheizt – das dauert 30 Sekunden.
Jetzt stellen wir unser Glas unter den Cappuccinatore. Den Cappuccinatore stellen wir von „Milchschaum“ auf „heiße Milch“ um (siehe Foto). Jetzt beziehen wir ungefähr 100 ml heiße Milch zu unserem Kaffee. Für Milchkaffee sollte das Verhältnis 1 zu 1 sein. Aber ihr könnt die Menge natürlich eurem Geschmack anpassen – das ist ja das schöne an einer Cappuccinatore. Sobald wir mit der Milchmenge zufrieden sind schließen wir das Ventil wieder.
Durch die Milch entsteht eine leichte Süße und der Kaffee wird wesentlich milder. Durch das Fett in der Milch werden die Aromen nochmal unterstrichen. Bei unseren Testern kam der Milchkaffee richtig gut an. Mit 70°C ist der Milchkaffee auch schön heiß.

den Cappuccinatore stellen wir auf heiße Milch

Milchkaffe besteht aus einer Hälfte Kaffee und einer Hälfe heiße Milch
Americano mit der Melitta Caffeo Solo
Eine gute Alternative zum klassischen Kaffee ist der Americano – ein mit heißem Wasser verdünnter Espresso. Und welchen Vorteil hat der Americano? In einem Vollautomaten wird der Kaffeepuck bei einem Espresso maximal 30 Sekunden extrahiert – bei „normalen Kaffee“ bis zu eine Minute.
Aber je länger der Brühvorgang dauert, desto mehr Bitterstoffe werden gelöst. Aus geschmacklicher Sicht ist es daher sinnvoll erst einen Espresso zu beziehen und diesen mit heißem Wasser zu verlängern. Der Americano hat weniger Bitterstoffe und ist besser bekömmlich. Außerdem kommen die Aromen des Espressos gut zur Geltung.
Für den Americano beziehen wir zuerst einen 50 ml Espresso mit kräftigem Aroma (3 Bohnen). Den Mahlgrad stellen wir auf Stufe 2. Wir verwenden natürlich kein Espresso Glas sondern eine Kaffee Tasse. Sobald der Espresso fertig ist, halten wir die Tasse leicht schräg unter den Cappuccinatore. Zu den Espresso beziehen wir jetzt die doppelte Menge heißes Wasser. Diesmal öffnen wir sofort den Drehregler ohne vorher den Knopf für Dampf zu aktivieren. Dadurch kommt nur heißes Wasser aus dem Cappuccinatore.
Zu den 50 ml Espresso geben wir jetzt ungefähr 100 ml heißes Wasser. Das Wasser lassen wir vorsichtig an der Tassenwand herunter laufen. Würden wir es sofort in den Espresso geben, würde es ganz schön spritzen, da es mit ganz schön viel Druck herauskommt.
Unsere Testpersonen sind durchweg überzeugt und vergeben mehr Punkte als beim normalen Kaffee. Das Aroma kommt beim Americano klarer zur Geltung.

im Test ist der Americano bekömmlicher als ein normaler Kaffee
Der Melitta Caffeo Solo & Perfect Milk bietet auf den ersten Blick nicht gerade viele Einstellungen. Aber das täuscht. Die Getränkemenge könnt ihr in ca. 30 Stufen zwischen 25-210 ml einstellen. Das Mahlwerk hat 5 Stufen und das Aroma könnt ihr in 3 Stufen einstellen. Beim Milchschaum seid ihr komplett flexibel was die Menge angeht und alternativ könnt ihr auch heiße Milch (ohne Schaum) beziehen. Daraus ergeben sich doch einige Möglichkeiten auf die wir jetzt für euch eingehen wollen.
Getränke individualisieren
Ein großer Vorteil beim Melitta Caffeo Solo ist die genaue Einstellung der Getränkemenge. Laut Anleitung könnt ihr diese von 30 bis 220 ml stufenlos einstellen. Auf den niedrigen Stufen erhaltet ihr Espresso auf den höheren logischerweise Kaffee. Was uns etwas stört ist, dass der Regler nicht beschriftet ist. Wir können demnach nicht genau sagen wie viel Milliliter wir auf welcher Stufe erhalten. Zwischen Abschnitt 2 und 3 erhaltet ihr 100 ml Kaffee. Auf der höchsten Stufe haben wir 209 ml (statt 220 ml) erhalten – auf der niedrigsten 25 ml (statt 30 ml). Etwas Wasser bleibt wahrscheinlich immer im Kaffeepuck zurück. Dadurch können wir sogar einen noch kräftigeren 25 ml Espresso brühen.
Regler für die Getränkemenge
Bei vielen Vollautomaten stehen euch für Espresso oft nur 3 Stufen zur Auswahl. Oder ihr habt eine festgelegte Menge von z.B 40 ml, die ihr nur relativ umständlich umprogrammieren könnt. Beim Melitta Caffeo Solo könnt ihr allein den Espresso in 5 Stufen zwischen 25 und 50 ml einstellen. Und das mit nur einem Handgriff.
Beim Milchschaum seid ihr komplett flexibel, da ihr die Menge selbst über das Ventil regelt. Zugegeben, das hat Vor- und Nachteile. Ihr könnt z.B. nicht exakt 100 ml Milch für euren Cappuccino beziehen. Hier seid ihr also immer auf euer Augenmaß angewiesen. Eine Alternative wäre es die Milch vorher in einem anderen Gefäss abzumessen. Das ist aber wiederum umständlich und ihr habt mehr Abwasch. Hier haben Geräte mit Milchdüse den Vorteil, dass ihr die Milch direkt in eurer Tasse abmessen und aufschäumen könnt. Die Cappuccinatore beim Caffeo Solo zieht sich die Milch solange aus dem Milchkarton bis ihr den Vorgang abbrecht.
wenn ihr dieses Ventil öffnet startet ihr den Bezug des Milchschaums
Neben Milchschaum könnt ihr auch einfach heiße Milch mit etwas Schaum beziehen. Ideal für Kakao oder Milchkaffee. Dazu müsst ihr die Cappuccinatore einfach umstellen. Allerdings könnt ihr die Temperatur und die Konsistenz des Milchschaums nicht direkt beeinflussen.
die Cappuccinatore bereitet sowohl heiße Milch (Glas Symbol) als auch Milchschaum (Tasse)
Wie ihr seht, seid ihr mit dem Melitta Caffeo Solo & Perfect Milk insgesamt sehr flexibel. Jedoch ist beim Espresso und Milchschaum immer euer Augenmaß gefragt. Dadurch schmecken eure Getränke vielleicht nicht immer genau gleich.
Zudem ist es schwierig bei den Getränken genaue Verhältnisse einzuhalten. Ein Cappuccino hat beispielsweise ein Verhältnis von 1 zu 3 (Espresso zu Milchschaum). Bei einem 200 ml Glas müsstet ihr demnach einen 50 ml Espresso und 150 ml Milchschaum beziehen. Wenn dann noch verschiedene Tassengrößen ins Spiel kommen müsst ihr rechnen. Andere (teurere) Vollautomaten passen auf Knopfdruck das Getränk eurer Tassengröße an. Das ist natürlich bequemer. Dafür gibt es in der Melitta Companion-App aber Tipps wie ihr verschiedene Getränke mit dem Vollautomaten am besten zubereitet.
Temperatur einstellen
Die Brühtemperatur könnt ihr in 3 Stufen einstellen. Ab Werk ist Stufe 2 eingestellt. Damit wird euer Espresso ca. 70°C heiß. Auf Stufe 3 haben wir 75°C gemessen. Beim Kaffee waren die Messungen sehr ähnlich zum Espresso. Der Unterschied je Stufe liegt demnach bei ungefähr 5°C. Wir empfehlen euch beim Melitta Caffeo Solo Vollautomaten die höchste Stufe. Damit haben wir die geschmacklich besten Ergebnisse in unserem Test erzielt. Die Temperatur des Milchschaums zu beeinflussen ist leider nicht möglich.
Weitere Einstellungen
Individuelle Profile speichern oder gar eigene Rezepte anlegen ist mit dem Melitta Caffeo Solo & Perfect Milk nicht möglich. Das würde mit der Cappuccinatore auch nicht funktionieren. Der Vollautomat merkt sich nach jedem Bezug die zuletzt eingestellte Kaffeestärke und die Getränkemenge. Das war es dann aber auch schon.
Ihr könnt am Vollautomaten den Härtegrad des Wassers einstellen, damit euch der Automat rechtzeitig ans Entkalken erinnert. Mit zu viel Kalk im System könnte es passieren, dass der Automat viel dampft oder das Wasser für den Brühvorgang nicht mehr heiß genug wird. Je besser die Pflege, desto länger gibt’s guten Kaffee.
Außerdem könnt ihr einstellen wann der Caffeo Solo sich ausschalten oder in den Energiespar-Modus wechseln soll. Es stehen euch jeweils 4 Stufen zur Verfügung. Ab Werk schaltet sich der Vollautomat nach 30 Minuten komplett aus und nach 5 Minuten wechselt er in den Spar-Modus. Ihr könnt das Gerät außerdem auf Werkseinstellungen zurücksetzen. Das hilft z.B. oft wenn eine Fehlermeldung auftritt mit der ihr nichts anfangen könnt.
Damit euch der Vollautomat lange guten Espresso zubereiten kann, ist eine regelmäßige Reinigung nötig. Die Auffangschalen sollten täglich gereinigt werden und die Brühgruppe laut Anleitung einmal wöchentlich. Der Cappuccinatore soll nach jedem Bezug durchgespült werden. Insgesamt dauert die Reinigung der Melitta Caffeo Solo & Perfect Milk ungefähr 25 Minuten pro Woche. Beim Modell ohne Milchsystem dauert die Reinigung keine 10 Minuten.
Entkalken müsst ihr, je nach Wasserhärte, alle 1-2 Monate. Das Programm dafür dauert rund 25 Minuten, während ihr nur 5-10 Minuten aktiv etwas machen müsst. Wir haben euch den passenden Entkalker und Wasserfilter rausgesucht.

Melitta Wasserfilter

Melitta Entkalker

Melitta Reinigungstabs

Melitta Reinigungs-Set

Melitta Milchreiniger
Cappuccinatore reinigen
Der Cappuccinatore kann entweder manuell durchgespült oder komplett zerlegt unter fließendem Wasser gespült werden. Wir empfehlen euch den Cappuccinatore nach jedem Bezug zu reinigen. Das ist bei allen Teilen, die mit Milch in Kontakt kommen sehr wichtig.
Für den manuellen Spülvorgang geht ihr genauso vor wie beim Milchschaum-Bezug. Nur, dass ihr diesmal den Milchschlauch in ein Wasserglas taucht. Stellt eine leere Tasse unter den Auslass der Cappuccinatore. Nun müsst ihr erneut über den Wasserdampf Knopf das Milchsystem aufheizen. Dann öffnet ihr mit dem Drehregler das Ventil für Milchschaum. Jetzt zieht der Cappuccinatore das Wasser aus dem Glas. Ihr solltet so lange durchspülen bis nur noch klares Wasser kommt. Zum Schluss nehmt ihr den Milchschlauch ab und spült ihn kurz mit klarem Wasser durch.

Cappuccinatore automatisch durchspülen
Ehrlich gesagt ist diese Art der Reinigung ziemlich umständlich, da ihr 2 Tassen braucht und alles manuell machen müsst. Unserer Meinung nach geht es einfacher, wenn ihr den Cappuccinatore komplett zerlegt und alle Teile mit Wasser durchspült. Das dauert weniger als eine Minute. Außerdem braucht ihr keine weiteren Tassen und am Ende ist es bestimmt noch gründlicher als das Spülprogramm.

einfacher: Cappuccinatore komplett zerlegen und spülen
Laut Anleitung sollt ihr den Spülgang 1x pro Woche mit einem Milchsystemreiniger durchführen. Der Cappuccinatore darf wohl nicht in die Spülmaschine. Die Einzelteile sind dafür aber sowieso zu klein.
Insgesamt ist die Reinigung des Milchsystem etwas aufwendiger als bei anderen Kaffeevollautomaten im Test. Ihr braucht für eine Reinigung nach Anleitung rund 20 Minuten pro Woche. Die Reinigung per Hand geht da schneller.
Abtropfschale & Kaffeesatzbehälter entleeren
Da der Melitta Caffeo Solo ein sehr kompakter Vollautomat ist, sind auch die Auffangschalen eher klein. Ihr müsst sie nach 6-8 Getränken ausleeren. Dann leuchtet diese LED im Display auf:

Display gibt Hinweis dass Kaffeesatzbehälter voll ist
Die Kaffeepucks landen ziemlich trocken und in perfekter Form im Tresterbehälter. Die Brühgruppe leistet also gute Arbeit. Vereinzelt landet etwas Kaffeepulver in der Abtropfschale.

trockene Kaffeepucks sind sauber vom Wasser getrennt
Das Ausleeren ist sehr einfach, denn der Hinweis erscheint nicht erst wenn die Schalen fast überlaufen. Die Schalen haben kaum Ecken und sind daher auch gut auszuspülen. Ihr könnt die beiden Schalen einfach nach vorne herausziehen. Es geht also alles sehr schnell.
In die Spülmaschine dürfen die Schalen laut Anleitung nicht. Einige Nutzer haben es trotzdem versucht und bei maximal 50°C (Eco-Modus) passiert wohl nichts.
Ihr solltet beide Schalen immer gleichzeitig leeren damit der Vollautomat nicht mit dem Zählen der Kaffeepucks durcheinander kommt. Die Auffangschalen lassen sich insgesamt leicht reinigen und ihr braucht dafür nur ca. 3 Minuten pro Woche.
Brühgruppe reinigen
Nur eine saubere Brühgruppe liefert euch guten Kaffee und Espresso. Daher sollt ihr sie laut Anleitung 1x pro Woche mit klarem Wasser abspülen.
Am besten nehmt ihr noch einen Reinigungspinsel zur Hilfe, damit ihr alle Kaffeereste erwischt. Einige Ecken sind nämlich nicht so einfach zu erreichen. Aber kein Spülmittel verwenden, denn sonst entfernt ihr auch das wichtige Schmierfett. Dann könnte die Brühgruppe quietschen oder verklemmen.

Brühgruppe an der Luft trocknen lassen
Ihr könnt die Brühgruppe ganz leicht über die Abdeckung auf der rechten Seite des Vollautomaten entnehmen. Den kleinen roten Knopf nach oben drücken und den Hebel nach links drehen. Schon könnt ihr sie herausziehen. Und wie sieht die Brühgruppe nach einigen Bezügen aus?
Beim Melitta Caffeo Solo haben wir durchschnittlich viele Kaffeereste auf der Brühgruppe gefunden. Was uns aber aufgefallen ist: im Innenraum liegen manchmal auch etwas mehr Kaffeereste. Das ist natürlich nicht gut, denn es erhöht den Reinigungsaufwand. Daher gibt es nicht die volle Punktzahl.
Dafür gibt es aber ein automatisches Reinigungsprogramm, um die Brühkammer von Kaffeefett zu befreien. Es dauert 15 Minuten und soll alle 200 Bezüge mit speziellen Reinigungstabs durchgeführt werden.
Insgesamt braucht ihr für die Reinigung der Brühgruppe ungefähr 5 Minuten pro Woche.
Entkalken & Wasserfilter
In der Anleitung und in der Companion-App findet ihr außerdem genaue Schritt-für-Schritt Hinweise zum Entkalken und Entfetten der Brühgruppe. In der App ist alles mit Bildern und in einfachen Sätzen erklärt. Das können wir euch nur empfehlen. Natürlich sollt ihr dafür die originalen Melitta-Produkte (Entkalker und Reinigungstabletten) nutzen. Während der Garantie-Phase würden wir euch das auch raten. Danach könnt ihr auch auf günstigere Alternativen umsteigen.
Das Entkalken dauert insgesamt ungefähr 30 Minuten. Ihr solltet das Programm spätestens nach 3 Monaten durchführen falls bis dahin kein Hinweis kam.
Den Wassertank könnt ihr 1x pro Woche mit warmem Wasser und etwas Spülmittel schwenken. Und die Öffnung ist auch groß genug um ihn mal auszuwischen. Entnehmen lässt er sich über den integrierten Griff auf jeden Fall sehr einfach. Nach dem Entkalken solltet ihr den Wassertank auch nochmal ausspülen. Dann ist der Kalk gerade gelöst und lässt sich leicht entfernen. In die Spülmaschine darf der Tank nicht.
In der App findet ihr auch noch Tipps zum Wasserfilter und eine Anleitung zum Reinigen des Milchsystems. Dort werden euch alle verschiedenen LED Hinweise erklärt und wie ihr das Problem beheben könnt. Durch die einfachen Anleitungen macht es euch Melitta bei der Reinigung wirklich einfach. Die passenden Produkte könnt ihr auch direkt über die App bestellen.
Weitere Kaffeevollautomaten aus unserem Test:

Melitta Latte Select
Note: 1,8 (gut)
€€€

Philips EP 2220 im Test
Note: 1,8 (gut)
€

DeLonghi Magn. S Smart
Note: 1,9 (gut)
€

DeLonghi Magnifica S
Note: 1,9 (gut)
€
Guten Tag
Der Drehregeler für die Brühmenge ist mir nicht klar, da ich verschiedene Tassen gebrauche mit unterschiedlichen Füllmengen
Frage, kann der Brühvorgang abgebrochen werden? Wenn ja wie? Und kann während dem der Brühvorgang die Brühmenge nachreguliert +/- werden? Wenn ja wie?
Beste Grüsse
Urs Messerli
Hi Urs, eine genaue ml-Angabe wäre natürlich besser als dieser Drehregler. Nachjustieren während dem Brühvorgang geht nicht soweit ich weiß. Wir würden dir empfehlen je Kaffeepuck rund 100 ml Kaffee zu beziehen. Für größere Tassen dann den Doppelbezug aktivieren. Je mehr Wasser durch einen Puck gepresst wird, desto mehr Bitterstoffe werden gelöst. Bis 100 ml wird der Kaffee schön intensiv und aromatisch. Am besten eine Küchenwaage zur Hilfe nehmen bis du die optimale Kaffeemenge gefunden hast. LG, Patrick